


The discus throw stands among track and field’s most technically demanding events, requiring athletes to generate explosive rotational power while maintaining precise balance, timing, and body positioning throughout a complex multi-phase movement sequence. Discus throw technique separates throwers achieving modest distances from those launching implements to championship-level marks—often by 20, 30, or even 50 feet at elite levels where seemingly minor technical refinements compound into dramatic performance differences.
Unlike purely strength-based activities, discus throwing demands sophisticated coordination integrating lower body power generation, core rotational acceleration, and upper body release mechanics into a seamless kinetic chain transferring energy from ground contact through fingertips at release. Athletes can possess remarkable strength yet struggle with mediocre distances due to technical deficiencies disrupting this energy transfer, while technically proficient throwers often exceed expectations based purely on physical capabilities.
This comprehensive guide explores every essential element of proper discus throw technique. From establishing correct grip and initial stance, through executing efficient wind-up and spin mechanics, to perfecting release timing and follow-through fundamentals, you’ll discover actionable coaching points and training strategies for developing technically sound throwing patterns. Whether coaching beginning throwers establishing foundational skills or refining advanced athletes pursuing state championship standards, mastering these technical principles provides the framework for continuous improvement and peak competitive performance.
Athletes who achieve technical proficiency in the discus throw often experience rapid performance progression as proper movement patterns enable more efficient power application compared to strength development alone, which progresses more gradually through training cycles. Schools recognizing exceptional throwers through visible displays—from traditional record boards to modern digital recognition systems—celebrate technical mastery alongside raw distance achievement while inspiring younger athletes to pursue proper technique development from their earliest throwing experiences.

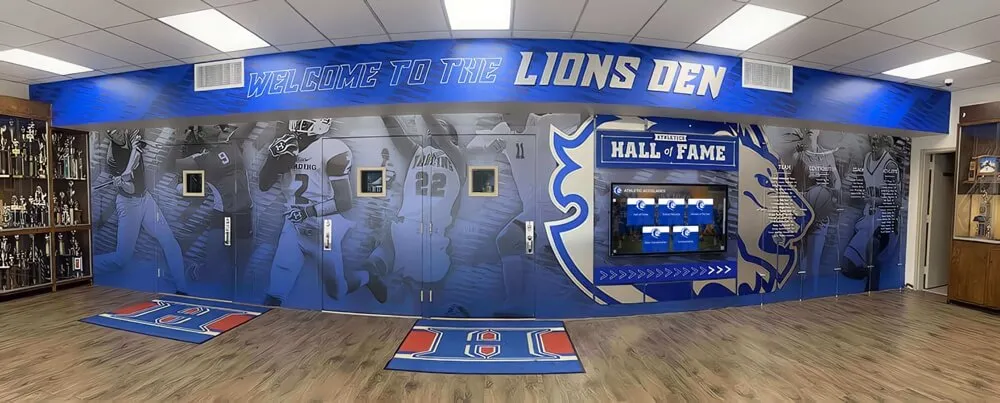
Comprehensive athletic recognition environments celebrate field event achievements including discus throw records alongside other track and field accomplishments
Understanding Discus Throw Fundamentals
Before examining specific technique phases, understanding the event’s basic parameters and competitive objectives establishes essential context for technical development.
Event Specifications and Equipment
The discus throw operates within precise regulatory frameworks governing equipment and competition areas:
Discus Specifications by Age and Gender
Competitive discus weights vary significantly based on athlete age and gender, requiring technique adaptations for different implement masses:
- High school boys throw 1.6 kilogram discus (approximately 3.5 pounds)
- High school girls use 1.0 kilogram implements (approximately 2.2 pounds)
- College and international men advance to 2.0 kilogram discus (approximately 4.4 pounds)
- College and international women continue with 1.0 kilogram implements
- Youth divisions often employ lighter implements (0.75-1.0 kg) for developmental athletes
The discus measures approximately 8.5 inches in diameter with specific thickness and rim requirements ensuring consistent flight characteristics. Legal implements must bear certification marks from governing bodies—uncertified training discuses may exhibit different flight patterns than competition implements, potentially teaching improper release angles.
Throwing Circle and Sector Regulations
Athletes execute throws from within a concrete or rubberized circular throwing area measuring 2.5 meters (approximately 8 feet 2.5 inches) in diameter. Specific regulations govern throwing execution including remaining within circle boundaries throughout the throw and during initial landing after release, exiting only from rear half of circle after implement lands, and directing throws within 34.92-degree sector marked by radial lines extending from circle center.
These constraints create technical challenges—the relatively small throwing surface demands exceptional balance control throughout rotational movements, while sector boundaries penalize throws deviating from centerline despite achieving good distance. Athletes must master directional control alongside distance production for competitive success.
The Physics of Discus Flight
Understanding basic flight mechanics helps athletes and coaches optimize release parameters for maximum distance:
Release Velocity as Primary Distance Factor
Research on discus flight consistently demonstrates that release velocity dominates distance outcomes—faster releases produce longer throws assuming reasonable release angles and minimal aerodynamic problems. Technical proficiency primarily manifests through generating higher release velocities via efficient power transfer from legs through torso into throwing arm acceleration.
Elite male throwers achieve release velocities approaching 25 meters per second (approximately 56 mph), while accomplished female throwers reach 22-23 m/s (approximately 50 mph). Each 1 m/s increase in release speed typically adds 6-8 feet of distance, illustrating why technical improvements enabling even modest velocity gains produce measurable competitive advantages.
Optimal Release Angle and Attack Angle
Unlike shot put where 40-42 degree release angles prove optimal, discus flight benefits from shallower 35-37 degree release angles due to aerodynamic lift generated during flight. However, this release angle must combine with proper attack angle—the discus attitude relative to airflow direction—for optimal lift generation.
Ideal attack angle positions the discus approximately 10-15 degrees nose-up relative to flight path, creating positive angle of attack generating aerodynamic lift extending flight distance beyond ballistic trajectory predictions. Excessive attack angle causes early stall and premature descent, while insufficient attack angle fails to utilize available lift, reducing distance potential from given release velocity.
Spin Rate and Flight Stability
Gyroscopic stability from discus spin prevents wobbling and tumbling that would disrupt aerodynamic efficiency. Proper release imparts rapid counterclockwise rotation (from thrower’s perspective) averaging 6-8 revolutions per second for accomplished throwers, creating stabilizing gyroscopic forces maintaining discus orientation throughout flight.
Insufficient spin allows wobble development degrading lift generation and causing unpredictable flight paths. Teaching proper finger positioning and release mechanics that impart appropriate spin proves essential for consistent technical execution.

Modern athletic facilities combine traditional trophy cases with digital displays creating comprehensive recognition environments celebrating throwing event achievements
Phase 1: Establishing Proper Grip
The discus grip represents the foundation for all subsequent technical elements—improper grip fundamentally limits release effectiveness regardless of other technical proficiency.
Fundamental Grip Mechanics
Correct discus grip balances control throughout the throw with clean release enabling velocity generation and spin impartation:
Finger Spread and Placement
Position the throwing hand flat against discus underside with fingers spread comfortably across the surface—not tightly bunched nor excessively splayed. The discus should rest against the distal pads of all fingers from index through pinkie, with fingertips curling slightly over the rim edge providing control without excessive tension.
The thumb rests on top of the discus providing stabilization but minimal active control. Many beginners mistakenly attempt to grip the discus between thumb and fingers like holding a plate, creating tension that restricts wrist action and prevents clean release. Instead, the discus should feel balanced across finger pads with natural gravity and centrifugal force during rotation providing retention rather than active gripping pressure.
Wrist Position and Flexibility
The wrist maintains relatively neutral alignment—neither excessively cocked back nor bent forward—allowing natural mobility throughout throwing motion. Excessive wrist tension attempting to secure the discus restricts the final wrist snap at release that imparts crucial spin and velocity.
Throwers benefit from wrist flexibility enabling full range of motion during release phase. Flexibility exercises including wrist circles, resistance band work, and light implement swings develop mobility supporting technical execution while preventing injury from repetitive stress.
Grip Pressure and Tension Management
Beginning throwers often grip too tightly, creating forearm tension that reduces arm speed and disrupts release timing. The grip should feel secure but relaxed—firm enough that normal throwing motion won’t dislodge the discus, but light enough that finger tension doesn’t inhibit movement speed.
A useful coaching cue suggests throwers should feel like the discus might slip out during wind-up and early rotation phases, with centrifugal force and throwing motion naturally securing it against the hand. This mental approach prevents excessive gripping that compromises throwing efficiency.

Digital kiosks enable detailed achievement tracking including event-specific records for discus throw and other field events
Common Grip Mistakes and Corrections
Several prevalent grip errors undermine throwing effectiveness:
Mistake 1: Gripping Too Far Toward Center
When athletes position fingers too far toward discus center rather than near rim edge, they reduce effective release radius decreasing velocity generation potential. Additionally, central gripping often correlates with thumb-and-finger gripping rather than proper finger-pad support.
Correction: Emphasize fingertip placement near but not over rim edge, with discus resting against finger pads. Practice grip positioning with stationary discus before incorporating into throwing motion, developing muscle memory for correct hand placement.
Mistake 2: Excessive Thumb Pressure
Active thumb gripping creates tension throughout the hand and forearm while interfering with natural discus spin during release. The thumb serves as passive stabilizer rather than active control point.
Correction: Practice grip drills where throwers consciously relax thumb pressure, allowing discus weight to rest entirely on finger pads. Some coaches use “thumbless grip” training exercises where athletes execute standing throws without thumb contact, developing feel for proper finger-based control.
Mistake 3: Finger Bunching
Clustering fingers together rather than spreading comfortably across discus surface reduces control and makes clean release difficult while limiting spin impartation.
Correction: Mark optimal finger spacing on training discus using tape or marker, providing visual reference for proper spread. Practice grip positioning repeatedly until correct spacing feels natural without visual confirmation.
Phase 2: Stance and Wind-Up Mechanics
Proper initial positioning and wind-up execution establish the foundation for effective rotational power generation.
Starting Stance Fundamentals
The throw begins with athletic positioning at rear of throwing circle:
Foot Placement and Body Orientation
Athletes stand at circle rear facing away from throwing direction with feet shoulder-width apart in comfortable athletic stance. The non-throwing side (left side for right-handed throwers) should orient slightly toward intended throwing direction—typically 90-180 degrees from sector centerline depending on individual style.
Weight distributes relatively evenly across both feet with slight emphasis on rear (right) leg for right-handed throwers. Knees demonstrate slight bend maintaining athletic readiness rather than locked-leg rigidity that restricts movement initiation.
Upper Body Position and Discus Placement
The throwing arm extends laterally from shoulder with discus positioned at or slightly below shoulder height. The non-throwing arm extends forward providing counterbalance and rotational reference. Upper body maintains relatively upright posture without excessive forward or backward lean.
Core muscles engage providing stability for subsequent rotational movements, though athletes should avoid excessive tension that restricts fluid motion initiation. The overall stance should feel balanced, athletic, and prepared for explosive movement rather than tense or unstable.
Wind-Up Execution and Weight Shift
The wind-up or preliminary swings prepare the body for rotational acceleration:
Single vs. Multiple Wind-Up Approaches
Beginning throwers often benefit from single wind-up technique executing one preparatory swing before initiating rotation, creating simpler timing patterns and reducing coordination demands. Advanced throwers may employ multiple wind-ups building greater rhythm and momentum, though additional complexity increases timing error potential.
Regardless of wind-up number, each swing should follow consistent pattern—swinging throwing arm back while rotating shoulders and torso away from throwing direction, then reversing to swing arm forward while beginning weight transfer onto right (rear) leg for right-handed throwers, creating loading position for rotational initiation.
Creating Torque Through Shoulder-Hip Separation
Effective wind-up creates significant separation between shoulder rotation and hip position—the shoulders turn substantially farther than hips during backswing, creating torque through torso that releases explosively during subsequent rotation. This “coiling” represents crucial power source that amplifies lower body drive.
Athletes should feel tension through obliques and core muscles at maximum wind-up position, indicating proper shoulder-hip separation. Insufficient separation—where shoulders and hips rotate together as single unit—eliminates this power source, forcing reliance exclusively on arm strength for distance generation.
Timing the Transition to Rotation
The critical moment arrives when backswing reverses direction initiating forward rotation and throw execution. Athletes should feel definitive weight transfer onto right leg as throwing arm reaches maximum backswing position, creating loaded position for explosive rotation initiation.
Common timing errors include beginning rotation before completing weight transfer, resulting in weak power generation, or pausing excessively at backswing completion, losing momentum and requiring restart rather than fluid transition. Proper execution feels like continuous rhythmic motion without distinct pauses between wind-up and rotation phases.

Modern recognition displays honor throwing event record holders through [permanent digital installations](https://halloffamewall.com/blog/touchscreen-display-high-school-gym-lobby-digital-trophy-solution/?utm_source=organic&utm_medium=seo-auto&utm_content=touchscreenwebsite&utm_campaign=discus-throw-technique&utm_term=seo) showcasing achievement details and athlete profiles
Phase 3: Rotational Technique and Spin Mechanics
The rotation or spin phase generates the majority of throwing velocity through coordinated lower body power and efficient movement across the circle.
Initiating Rotation and Power Position Entry
Explosive rotation begins from loaded wind-up position:
Right Leg Drive and Pivot Initiation
Right-handed throwers drive forcefully off the right (rear) leg while simultaneously pivoting on the ball of the right foot. This combined pushing and pivoting action initiates rotational acceleration while the left leg swings in wide arc around the body.
The right leg drive should feel similar to broad jump takeoff—explosive and directed horizontally across circle rather than vertically upward. Vertical jumping wastes energy in non-throwing directions while reducing rotational velocity. Proper execution maintains low, athletic position throughout rotation.
Left Leg Sweep and Landing Position
The left leg swings aggressively in wide arc from initial stance position toward circle center, eventually landing near or slightly past circle center point. This sweeping action contributes to rotational momentum while positioning the body for power position establishment.
The left foot should land on ball-of-foot with heel elevated, allowing continued rotation rather than stopping abruptly. Landing flat-footed or on heel creates braking force that dissipates rotational energy. The left knee demonstrates moderate bend maintaining athletic position and enabling subsequent extension during release phase.
Achieving Proper Power Position
The power position represents the critical instant where maximum throwing velocity can be generated:
Lower Body Positioning Fundamentals
At power position, the athlete should achieve positioning including both feet grounded with wide base providing stability, right foot positioned near circle rear approximately 90 degrees from throwing direction, left foot near circle center oriented toward throwing direction, knees bent in athletic stance with weight primarily on right (rear) leg, and hips and shoulders oriented perpendicular to throwing direction with significant torso torque.
This positioning creates coiled spring effect—the lower body has rotated substantially while upper body and throwing arm lag behind, creating torque that releases explosively during final throwing action.
Upper Body Position and Arm Lag
Throughout rotation, the throwing arm should trail body rotation significantly—a principle called “arm lag” or “keeping the discus back.” The arm remains relatively extended laterally at shoulder height rather than wrapping around body or pulling forward prematurely.
Maintaining arm lag preserves torso torque and delays peak arm acceleration until final release moment when other body segments have contributed their velocity. Premature arm acceleration—pulling the discus forward early in rotation—eliminates sequential energy transfer, forcing arm muscles to generate all throwing velocity independently.
Balance and Center of Mass Control
Despite violent rotational movements, elite throwers maintain remarkable balance throughout spin phase, controlling center of mass position and preventing falling or stumbling that would disrupt energy transfer.
Balance comes primarily from proper foot positioning creating wide, stable base, maintaining low athletic position rather than standing upright, engaging core muscles stabilizing torso position, and keeping head position relatively level without excessive tilting or rotation.
Athletes who struggle with balance often benefit from slower-paced rotation drills emphasizing positional control before gradually increasing rotation speed as stability improves.

Interactive displays engage current athletes by showcasing [previous record performances](https://best-touchscreen.com/blog/player-of-the-month-programs-how-schools-build-recognition-culture-athletics/?utm_source=organic&utm_medium=seo-auto&utm_content=touchscreenwebsite&utm_campaign=discus-throw-technique&utm_term=seo) providing benchmarks and inspiration
Common Rotation Phase Mistakes
Several technical errors frequently undermine rotational effectiveness:
Mistake 1: Rising During Rotation
Many developing throwers stand progressively more upright during rotation, raising their center of mass and reducing power generation while compromising balance. This often results from inadequate leg strength forcing athletes to rely on more upright positions they can control better.
Correction: Emphasize maintaining knee bend and athletic position throughout rotation. Strength training targeting legs and core provides physical capability for sustaining low positions. Practice rotation drills focusing exclusively on position maintenance without release, developing movement patterns and strength simultaneously.
Mistake 2: Spinning on Heels
Landing on heels rather than balls of feet during rotation creates braking forces that slow rotation and disrupt balance while preventing efficient transition into release phase.
Correction: Practice rotation entries emphasizing ball-of-foot landing for left foot at circle center. Some coaches use auditory feedback—landing on heels creates louder sound helping athletes recognize and correct the error. Footwork drills without discus develop proper landing patterns before integrating full throwing motion.
Mistake 3: Early Arm Pull
Pulling throwing arm forward prematurely during rotation—typically from impatience or attempting to compensate for inadequate lower body power—eliminates crucial arm lag and torso torque that enable high release velocities.
Correction: Practice drills emphasizing “orbit maintenance” where throwing arm stays extended laterally throughout rotation. Partners or coaches provide verbal cues when arm begins pulling forward, developing awareness. Video analysis showing elite thrower arm positions compared to athlete’s current pattern provides visual learning reinforcement.
Phase 4: Release Mechanics and Follow-Through
The release phase represents the culmination of all preceding technical elements, converting accumulated velocity into discus flight.
Optimal Release Timing and Sequencing
Proper release follows sequential energy transfer from lower body through torso into arm:
Lower Body Extension and Block
Release initiation begins with aggressive extension of right (rear) leg driving hips forward and upward while the left (front) leg “blocks”—remaining relatively firm creating stable pivot point for torso rotation and arm whip. This blocking action prevents continued forward translation, channeling energy into rotational acceleration rather than forward movement.
The sensation should resemble jumping or exploding upward off the right leg while the left leg provides firm foundation. Athletes who continue moving forward across circle during release typically demonstrate insufficient left leg block, allowing energy to dissipate into horizontal translation rather than contributing to throwing velocity.
Torso Rotation and Chest Drive
Hip extension initiates explosive torso rotation accelerating shoulders and chest toward throwing direction. The chest should “lead” the throwing motion—rotating aggressively while throwing arm continues lagging behind, maximizing torso contribution to arm acceleration.
Peak torso rotational velocity should occur slightly before peak arm velocity, enabling torso speed to transfer into arm acceleration through sequential kinetic chain. Simultaneous torso and arm peak velocity indicates insufficient sequential transfer—the arm accelerates independently rather than building upon torso contribution.
Arm Path and Acceleration Pattern
From lagged position at power position, the throwing arm accelerates through wide arc sweeping from lateral position into release point. The elbow should remain relatively extended throughout—not completely locked but avoiding significant bend that would shorten effective radius and reduce velocity.
Acceleration follows smooth, continuous pattern progressively increasing arm velocity rather than jerky or interrupted motion. The arm path should feel natural and flowing rather than forced or mechanically rigid, though “natural” requires technical development through practice since untrained movement often incorporates inefficient patterns.
Release Point and Discus Delivery
The specific instant and position of release dramatically affects throw quality:
Release Height and Angle
Optimal release occurs when throwing arm reaches approximately 35-37 degrees above horizontal, positioning discus for ideal flight trajectory. Release typically happens slightly in front of the body—approximately aligned with or just ahead of the front (left) foot for right-handed throwers.
Releasing too early—while arm remains behind body—produces low, diving throws. Releasing too late—after arm passes optimal angle—sends discus upward at excessive angle causing premature stall. Developing consistent release timing requires extensive repetition building kinesthetic awareness of proper release position.
Finger Action and Spin Impartation
At release instant, fingers actively snap off the discus rim imparting rapid counterclockwise spin (from thrower’s perspective) providing gyroscopic stability. The release feels like flicking or rolling discus off fingertips rather than pushing or throwing like a ball.
Proper finger action leaves discus rolling across fingers from pinkie toward index finger before leaving hand, naturally creating appropriate spin rate. The index finger typically remains in contact longest, serving as final release point and primary spin contributor.
Wrist Snap and Follow-Through
The wrist snaps through release contributing to velocity and spin while the entire arm continues following through across body in natural deceleration pattern. Abrupt stopping after release indicates athlete fighting natural movement, creating injury risk and suggesting earlier technical problems preventing proper acceleration.
Follow-through should feel relaxed and unforced—the arm simply continues motion initiated during acceleration phase. The body rotates fully toward or past throwing direction as natural consequence of explosive release rather than deliberate post-release action.
Common Release Phase Mistakes
Several errors frequently undermine release effectiveness despite proper execution of earlier phases:
Mistake 1: Throwing with Arm Only
Isolating arm action without coordinated lower body and torso contribution drastically limits achievable velocity. This typically results from insufficient understanding of kinetic chain principles or inadequate lower body strength forcing compensation through arm-dominant throwing.
Correction: Practice release drills emphasizing lower body drive and chest rotation before arm acceleration. Standing throws from power position help athletes feel proper sequencing without rotation complexity. Video comparison showing force plate data or velocity measurements demonstrates performance improvements from whole-body coordination versus arm-only throwing.
Mistake 2: Insufficient Left Leg Block
Continuing forward motion through release rather than creating firm left leg block allows energy to dissipate into forward translation rather than contributing to rotational velocity and arm whip.
Correction: Emphasize aggressive left leg bracing during release phase. Some coaches use resistance band drills where athletes practice blocking against external force, developing strength and technical pattern. Chalk marks on circle surface showing excessive forward foot movement after release provides visual feedback for correction.
Mistake 3: Early Release with Low Trajectory
Releasing discus before arm reaches optimal angle produces low, diving throws that never achieve proper flight altitude regardless of release velocity. This often stems from rushing or insufficient balance control at power position.
Correction: Video analysis showing release point relative to body position helps athletes recognize early release timing. Practice drills emphasizing patient arm lag and release delay until proper arm position develops timing awareness. Trajectory analysis of throws—comparing successful high-arc throws with diving attempts—demonstrates objective performance differences from timing variations.

Traditional and digital recognition systems preserve [throwing event records](https://digitalrecordboard.com/blog/maximize-athletic-recruiting-digital-recognition-displays/?utm_source=organic&utm_medium=seo-auto&utm_content=touchscreenwebsite&utm_campaign=discus-throw-technique&utm_term=seo) inspiring future athletes while documenting program history
Training Progressions for Technical Development
Developing proficient discus throw technique requires systematic progression from fundamental movements through complete throw integration.
Foundational Movement Patterns
Beginning throwers should master basic components before attempting full throw execution:
Standing Throw Progression
Standing throws executed from power position without rotation isolate release mechanics enabling focus on lower body extension, torso rotation, arm path, release timing, and follow-through without rotation complexity. Athletes should achieve consistent standing throw technique demonstrating proper sequencing before adding rotation demands.
Progressive standing throw variations include feet positioned at power position executing basic throws, adding preliminary wind-up from standing position, incorporating single-step entry into power position, and gradually increasing intensity toward maximum effort standing throws approaching 60-70 percent of full throw distances.
South African Drill and Variations
The South African drill—also called orbit drill—develops rotational movement patterns and arm lag through simplified technique. Athletes stand at circle rear, execute abbreviated wind-up, then rotate 360 degrees maintaining discus in extended lateral position without releasing, developing balance, rotation timing, arm lag maintenance, and power position achievement.
Variations progress from slow-speed position emphasis to moderate rotation speed developing rhythm, adding release after achieving consistent rotation quality, and incorporating into full throw sequence as technical confidence develops.
Rhythm and Timing Development
Consistent throwing rhythm proves essential for reliable technical execution:
Counting and Verbal Cuing
Many coaches employ counting systems helping athletes establish consistent rhythm patterns. Example sequences include “One” (wind-up initiation), “Two” (rotation start), “Three” (power position), “Throw” (release), creating auditory timing reference athletes internalize through repetition.
Athletes eventually transition from external counting to internal rhythm awareness, though returning to verbal cues during technical struggles often helps identify timing disruptions causing performance inconsistency.
Video Analysis and Feedback
Regular video recording from multiple angles enables athletes to compare their technical execution against model patterns while identifying specific errors disrupting efficient movement. Side view shows rotation path and release angle clearly, rear view reveals balance and foot positioning, and release view displays arm path and follow-through pattern.
Comparing successful throws with foul attempts or short throws often reveals subtle technical differences invisible without video analysis—slight balance shifts, premature arm pull, or delayed release timing that dramatically affect outcomes despite appearing similar in real-time execution.
Strength and Mobility Training
Technical proficiency requires supporting physical capabilities:
General Strength Development
Discus throwing demands full-body strength with emphasis on legs providing rotational drive, core stabilizing torso and transferring lower body power, shoulders and upper back supporting throwing arm acceleration, and forearms and wrists controlling discus through release.
Foundational strength exercises supporting throwing include squats and lunges building leg drive capability, rotational medicine ball throws developing power transfer patterns, overhead pressing movements strengthening throwing musculature, and core training emphasizing rotational strength and stability.
Throwing-Specific Power Development
Beyond general strength, throwers benefit from explosive power training including Olympic lifting variations teaching rapid force production, plyometric exercises developing reactive strength, and implement training with varied weight discuses—lighter implements for speed development and heavier implements for strength emphasis.
Periodized training cycles emphasize different qualities at appropriate times—general strength during off-season, power development during pre-season, and technical refinement with competition-weight implements during competitive season.
Mobility and Flexibility Requirements
Efficient discus technique demands substantial mobility including hip flexibility enabling deep athletic positions during rotation, thoracic spine rotation allowing shoulder-hip separation and torso torque, shoulder range of motion supporting wide arm paths, and ankle mobility permitting stable foot positions throughout rotation.
Regular mobility work through dynamic warm-ups, static stretching during cool-downs, and dedicated flexibility sessions addresses restrictions limiting technical execution while reducing injury risk from repetitive throwing stress.

Modern recognition platforms enable athletes to explore [comprehensive achievement databases](https://halloffame-online.com/blog/sports-memory-wall-ideas-showcase-school-athletic-legacy/?utm_source=organic&utm_medium=seo-auto&utm_content=touchscreenwebsite&utm_campaign=discus-throw-technique&utm_term=seo) including event-specific records and performance progressions
Competition Strategy and Mental Preparation
Technical proficiency must integrate with competitive execution under pressure:
Pre-Competition Preparation
Systematic warm-up prepares body and mind for optimal performance:
Physical Warm-Up Sequence
Effective throwing warm-ups progress through general cardiovascular activity elevating body temperature, dynamic flexibility exercises addressing throwing-specific mobility needs, progressive throwing starting with light implements and short efforts, and technical rehearsal throws at moderate intensity reinforcing movement patterns before competition attempts.
Athletes should complete final warm-up throws 5-10 minutes before first competition attempt, maintaining physical readiness without excessive fatigue while preserving mental focus for competitive throws.
Mental Rehearsal and Focus Strategies
Mental preparation proves equally important as physical warm-up for consistent competitive execution. Effective strategies include visualization rehearsing successful technical execution and desired outcomes, verbal cuing reviewing key technical points for current conditions, breathing exercises managing competitive anxiety and maintaining relaxed intensity, and pre-throw routines establishing consistent preparation pattern reducing variability.
Athletes who develop consistent pre-throw routines—specific steps performed identically before each throw—often demonstrate greater competitive reliability by establishing familiar psychological states supporting technical execution under pressure.
Managing Competition Attempts
Most competitions allow three to six attempts with specific strategic considerations:
Progressive Attempt Strategy
Conservative early-attempt strategies often prove counterproductive—athletes should commit fully to quality throws from first attempt rather than “feeling out” competition with tentative efforts. However, progressive intensity can work within attempts through executing first throw at 85-90 percent intensity ensuring mark on scoreboard, applying full effort second and third throws pursuing maximum distance, and reserving technical adjustments for later attempts if earlier throws reveal specific problems.
Environmental Adaptation
Competition conditions often differ from practice environments requiring technical adaptation including wind direction and velocity affecting ideal release trajectory, circle surface varying in texture and moisture affecting foot traction, sector slope or landing area conditions influencing throw measurement, and background visual references changing depth perception and directional orientation.
Experienced throwers develop adaptation skills through competing in varied conditions, though most maintain core technical patterns rather than attempting major modifications risking complete technical disruption.
Handling Competitive Pressure
Mental preparation separates technically capable athletes who perform under pressure from those who struggle despite practice proficiency:
Process Over Outcome Focus
Athletes who fixate on competitive outcomes—beating specific opponents or achieving target distances—often experience performance anxiety disrupting technical execution. More effective approach emphasizes process focus on executing specific technical elements within athlete’s control, trusting that proper technique produces competitive results, maintaining consistent pre-throw routine regardless of competitive situation, and accepting individual throw outcomes without carrying frustration or excitement into subsequent attempts.
Learning from Competition Experience
Every competition provides learning opportunities regardless of results through identifying technical elements that performed well under pressure versus those requiring additional training emphasis, recognizing mental state and focus patterns associated with successful attempts, noting environmental or competitive factors affecting performance, and establishing specific technical or mental preparation adjustments for future competitions.
Athletes who approach competitions as learning experiences rather than purely outcome-focused events demonstrate more consistent long-term development compared to those who view unsuccessful competitions as failures rather than information sources.

Permanent recognition installations honor exceptional throwing performances while [documenting athletic program excellence](https://donorswall.com/blog/school-trophy-case-ideas/?utm_source=organic&utm_medium=seo-auto&utm_content=touchscreenwebsite&utm_campaign=discus-throw-technique&utm_term=seo) across multiple sport disciplines
Safety Considerations and Injury Prevention
The discus throw presents unique safety challenges requiring careful attention from athletes, coaches, and event administrators:
Throwing Area Safety Protocols
Proper safety management prevents injuries to throwers, officials, and spectators:
Sector Control and Clearance
Only authorized athletes and officials should occupy throwing sector areas during competition or practice. Clear communication protocols ensure individuals remain outside sector boundaries when throwing occurs, discus retrieval happens only after explicit authorization from supervising coach or official, and spectators maintain safe distances behind appropriate barriers or designated viewing areas.
Many serious discus accidents occur during practice rather than competition when safety protocols receive less attention—coaches must enforce identical safety standards regardless of setting.
Equipment Inspection and Maintenance
Regular inspection of throwing equipment prevents failures that could cause injury including checking discus rims for cracks, chips, or sharp edges potentially causing hand injuries, examining circle surface for uneven areas or deterioration affecting balance, verifying sector lines remain clearly visible for directional reference, and replacing worn or damaged equipment before failure occurs.
Damaged discuses may exhibit unpredictable flight characteristics creating safety hazards beyond the intended sector, warranting immediate removal from use.
Common Throwing Injuries and Prevention
Despite relatively low injury rates compared to contact sports, throwers experience specific injury patterns:
Shoulder and Elbow Overuse Injuries
Repetitive throwing creates stress on shoulder rotator cuff, shoulder labrum, and elbow tendons potentially causing inflammation or structural damage. Prevention strategies include proper throwing progression avoiding excessive volume increases, adequate recovery time between throwing sessions, strengthening exercises targeting rotator cuff and scapular stabilizers, and technique emphasis on whole-body coordination rather than arm-dominant throwing.
Athletes experiencing persistent shoulder or elbow pain should seek evaluation before continuing training—minor inflammation treated early typically resolves quickly while ignored symptoms often progress to serious injuries requiring extended recovery.
Lower Back Stress
Rotational forces during throwing create significant lower back stress, particularly for athletes with insufficient core strength or poor technique. Protective measures include core strengthening emphasizing rotational control and stability, proper technique avoiding excessive back hyperextension during release, flexibility training maintaining hip and thoracic spine mobility, and recognition of back pain as warning sign warranting technique evaluation and potential training modification.
Acute Injuries from Balance Loss
Falls during rotation occasionally occur when athletes lose balance potentially causing wrist, ankle, or shoulder injuries from impact. Risk reduction includes progressive skill development ensuring stability before increasing intensity, circle surface maintenance preventing slipping hazards, appropriate footwear providing traction without restricting foot positioning, and teaching proper falling techniques minimizing injury severity when balance loss occurs.
Celebrating Discus Throw Achievement
Schools and athletic programs that recognize throwing accomplishments create cultures valuing field event excellence alongside more visible track events:
Recognition Opportunities Beyond Championships
While state championships and school records receive natural attention, comprehensive recognition includes athletes achieving personal records demonstrating individual improvement, qualifying for district or regional competitions showing competitive advancement, earning varsity letters or team awards recognizing commitment and contribution, and demonstrating technical mastery visible through improved form regardless of absolute distance.
Recognizing improvement and effort alongside pure performance outcomes ensures developing athletes receive appreciation while pursuing competitive standards, maintaining motivation through progression phases where championship achievement remains aspirational rather than immediate.
Modern Digital Recognition Solutions
Contemporary recognition technology enables dynamic, engaging display of throwing accomplishments through interactive digital displays showcasing athlete profiles with photos, statistics, and achievement progressions, real-time record boards updating automatically as athletes achieve new marks, historical comparison features connecting current throwers with program legends, and multimedia integration including technique videos and competition highlights.
Solutions like Rocket Alumni Solutions provide schools comprehensive platforms for celebrating track and field achievements including discus throw records, enabling easy content updates maintaining current information while preserving historical achievements creating lasting institutional memory accessible to current students, alumni, and visitors exploring program traditions.
Conclusion: Mastering Discus Throw Technique for Competitive Excellence
Proficient discus throw technique represents the convergence of proper grip mechanics, efficient rotational patterns, precise release timing, and coordinated full-body power generation into seamless throwing execution. Athletes who master these technical elements through systematic training progressions and dedicated practice develop throwing capabilities far exceeding what raw strength alone could produce, while consistent technical patterns enable reliable competitive performance under championship pressure.
The journey from beginning thrower learning basic grip and standing throws through accomplished competitor pursuing state championship standards requires patience, quality coaching, and commitment to technical refinement over extended development periods. However, athletes who embrace this process experience the unique satisfaction of technical mastery—understanding not merely that certain approaches work but why they work through direct experience of biomechanical principles translated into competitive performance.
Whether coaching youth athletes establishing foundational movement patterns, developing high school competitors pursuing conference and state recognition, or refining elite throwers targeting national-level achievement, systematic application of proven technical principles provides frameworks for continuous improvement while reducing injury risk and building sustainable throwing careers extending across multiple competitive seasons.
Schools that celebrate throwing achievement through visible recognition honor the dedication technical mastery requires while inspiring younger athletes to pursue field event excellence. Modern recognition solutions enable comprehensive achievement documentation preserving program history while maintaining engaging, current content celebrating both legendary performers and emerging talents building the next chapter of institutional athletic tradition.
Ready to showcase your track and field program’s throwing achievements through engaging, interactive displays? Rocket Alumni Solutions provides comprehensive digital recognition platforms celebrating athletic excellence across all events including detailed discus throw records, athlete profiles, and achievement progressions that inspire current competitors while honoring program history.